 The unique, modular uKai kayak, built for high performance and perfection to minimize space consumption. Easy to transport; easy to store. uKai, the boat in your car.
| Length | 17'5" | 5.3 m |
| Width | 23" | 59 cm |
| Weight | 54.8 lb | 24.9 kg |
| Capacity | 400 lb | 181 kg |
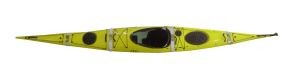
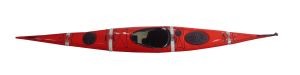
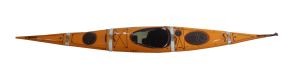
Color Options
|
Yellow |
|
Red |
|
Orange |
- Starting from the center, push the locking tab as you simultaneously pull the clasp to release the buckle.
- Bring the center piece into the groove of the fastening band, ensuring the edges are aligned for a secure fit.
- On the back half of the center piece, pull the two already connected components into the groove of the fastening band.
- Once fitted and aligned, avoid the edges of the cockpit rim by slightly tucking the buckle and sliding it under before locking it down.
TIP: A quick, strong breath of air will help dislodge any dirt, sand, or grit in the grooves. Before you attach sections together, a quick sweep of the compartment rim will also help ensure a secure fit. - To attach the bow, tuck the section under the buckle. Make sure the two sections are securely together before attachment, in order to ensure a smooth fit.
- To attach the rudder, move the blade into the top position, having cleared the lines. Angling the entire assembly 45 degrees to the front when you connect the bolt will allow for a secure connection.
- Rotate the rudder into the back position and hold the rudder line as you move to the cockpit, connecting and locking it in place. Simply pull the line at your side to release the rudder once you’re in the water.
Note: The rudder design varies slightly across models. This is only cosmetic; each rudder functions the same way. - Finally, connect the steering lines with a quick snap.
Now you and your kayak are ready for the water!
- First, disconnect the steering lines. Then, move onto the rudder line. Hold it tight before disconnecting so the blade doesn’t spring out of top position.
- Rotate the entire rudder assembly forward to unlock the connecting bolt and pull up, slowly releasing the blade.
- Unbuckle the stern fastening band, then lift the stern section out.
- Moving forward, release the buckle on the fastening band behind the cockpit. Pull the ends free. Lift from the center itself, holding onto the inside edge of the cockpit.
TIP: If the center section feels a little tight when releasing, reach across the hull and pull up for an easy separation. - Next, disconnect the bow. Place it in the cockpit for compact, easy storage. Start by the placing the wide end and then rotating it to face the bottom up.
- For the stern, with the very tip facing forward, tuck the rudder on the side beneath the edge of the cockpit, then slide the stern section into place.
Now that you have disassembled your uKai touring kayak, you can easily transport and store your boat. The disassembled and compartmentalized uKai Touring Kayak can be easily stored in the provided carrying bags, transported inside vehicles, and stored in small, convenient spaces.
